
Getting Started: Admin Guide V2
Welcome to TimeKeeper. As an administrator, you'll have access to all the features in the system. This guide is designed to cover the basics you'll need to get started - if you have any questions which aren't covered in this guide, you can use the search feature above or get in touch with our Customer Success team on the live chat!
This guide covers:
Adding employees
Adding a Job
Setting up clock in stations
Managing Employee Time Entries
Key reports
So let's get started!
Adding an Employee
When adding employees, you have a few options:
Add each employee individually
Import all employees using our downloadable CSV/Excel template - To follow the guide on how to do this, please:
If you’re a BrightPay UK customer, import employees directly from your BrightPay account into TimeKeeper. To follow the guide on how to do this, please:
Once your employees are added to the system, they’ll automatically receive either an email or text message with an invitation to activate their account and set a password, so that they can log in on mobile or web. This message will also include their 4 digit pin, which allows them to clock in on a tablet kiosk.
If a staff member having trouble clocking in, they can follow this guide to troubleshoot:
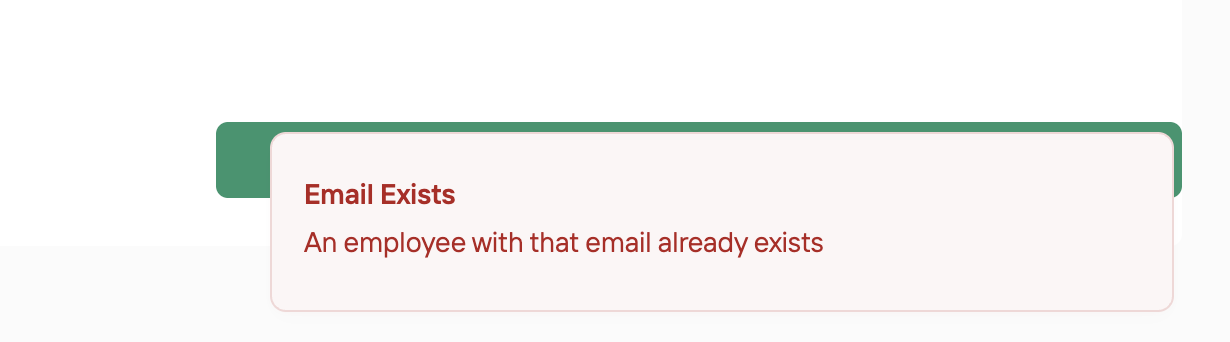
If when adding an employee you get the below error message, please contact [email protected] as the email address/mobile number may be associated with another timekeeper account.
Adding a Job
If you'd like to track your employees time against certain projects, you'll need to set up Jobs. Jobs can also be used to ensure employees are on site when clocking in and automatically block off-site clock in attempts, through the use of Job Geofences.
Please note: Jobs are part of our Pro Plan.
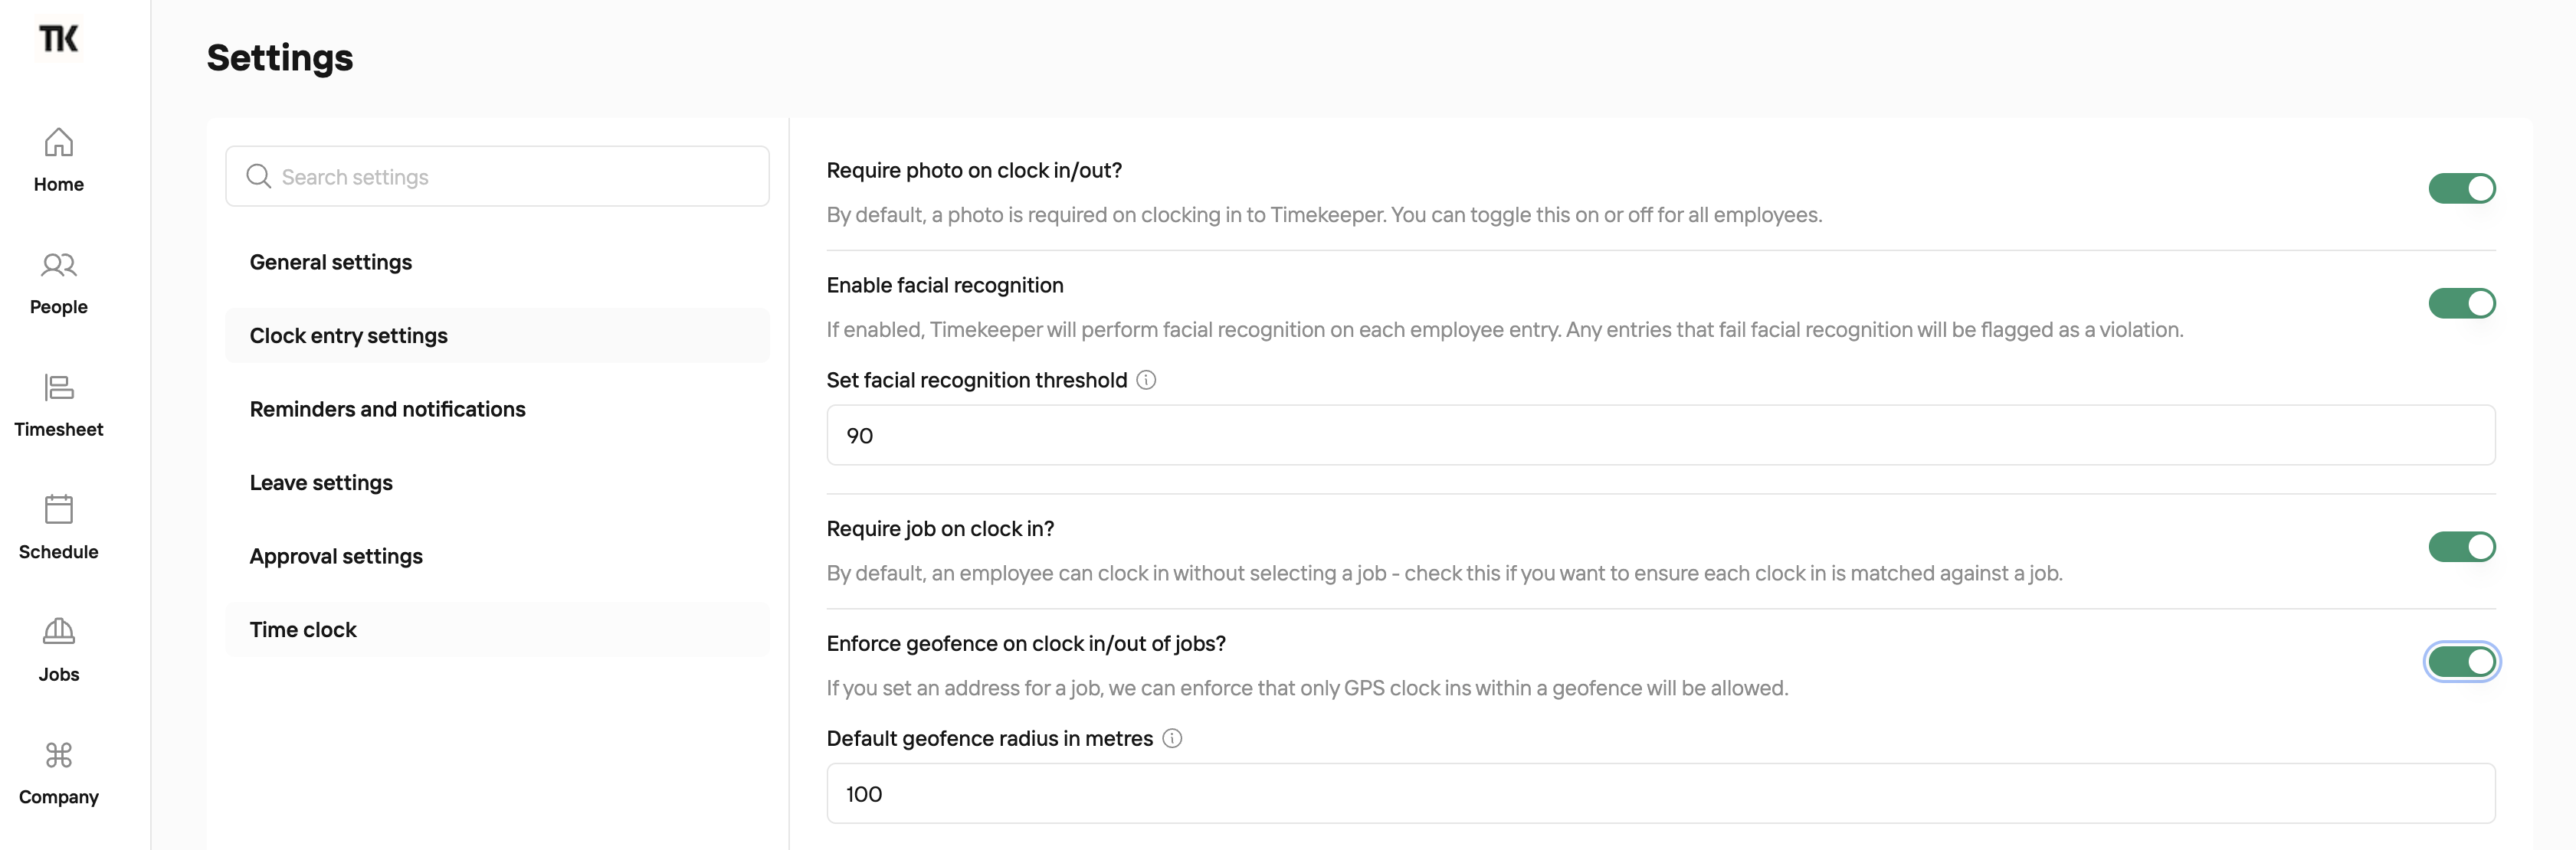
As well as configuring your jobs, you'll need to tick 'Require job on clock in' under your Account Settings to enforce this requirement. If you set an address for a job, a geofence will be generated around that job. If you have 'Enforce geofencing' switched on under your Account Settings, employees must be within the geofence to clock in or out of that job. Jobs which have no address set can be clocked into from any location.
To enable these settings, head to More > Settings > Clock Entry Setting
Setting up clock in stations
When you add an employee, they automatically get permission to use a shared clock-in station (tablet kiosk) with the 4‑digit PIN that’s generated and sent to them.
Shared clock-in stations are designed for fixed locations (e.g. offices, warehouses, manufacturing sites) where staff work from the same place each day, rather than staff who travel to different sites daily.
If you want employees to clock in on a central tablet, you’ll need to set this up first. Most Android and iOS tablets can be used as a kiosk, provided they:
Have a front-facing camera
Have a reliable internet connection
Are not older than 5 years
You’ll also need to create a Location in the web portal before setting up the kiosk.
Setting Up A Location
Once the location is set up on web portal, the admin will need to download the app onto a tablet. Please sign in with your admin details, when prompted select Kiosk Mode and link the tablet to the location you have just created.
Additional notes
Managers can set up kiosks if their permissions allow it. Ensure “This manager can access kiosk mode” is enabled in their Access & Permissions tab.
To allow all employees to clock in/out via a manager’s kiosk, enable “Enable all employees to clock in/out via Manager Kiosk” in More > Setting > Clock Entry Setting.
Managing Employee Times Entries
As an admin, you’ll be able to view and edit all employees’ clock in and out times. Team Managers also have permission to edit their team’s clock in times. From the Timesheet screen, you can edit or add times, as well as editing the details for a time entry (for example, changing the job that time was allocated to).
Please note: The hours seen on this screen are ‘raw’ times.
Key Reports
There are lots of handy reports in TimeKeeper, but the most commonly used reports are the Employee Timesheet Report and Staff Timesheet Excel Report.
The Employee Timesheet Report allows you to view an individual employee's hours over a time period, as well as checking their time entries and location entries. Employees also have access to their own timesheet report on the app, so can check their own hours.
The Staff Timesheet Report allows you to view hours over a time period for a group of employees - you have the option to filter this report by team, location and contract type. The default format is a web based preview, but if you’d like to download this report to your computer, you can change the ‘Export format’ at the top of the screen.
The Staff Timesheet Excel Report is the most comprehensive report for payroll, as it contains multiple sheets with daily logs and breakdowns of your employees’ hours.